I am never bored, always following my curiosity, thinking deeply and learning new things. In addition to projects at home with my family, I work as a Therapist and Supervisor in West Michigan, USA.
In Spring 2018 we added two dogs to our family of three humans and two cats. Of course certain chores accompany pet ownership and I am the person most often on poop patrol. I got this job for a couple of reasons, but primarily they all lead back to… I don’t want to step in poop. Interestingly this morning as I was scanning for poop (and sticks) preparing to mow the lawn, I noticed that there was a lot going on down there.
I attribute these mushrooms to years of mulching grass clippings and fallen leaves into the lawn and not to dog poop, but I could be wrong. Here is what I learned:
The Jack-O-Lantern mushrooms will glow in the dark faintly and make you very very sick if eaten.
The Stinkhorn Mushroom really does stink and looks like severed fingers after you mow over it in the lawn…gasp!
Meadow Mushrooms
I am giving this impressive collection its own slideshow so you can see how big it is and how cheerful in the lawn.
This slideshow requires JavaScript.
Others I found..
I’m trying to refrain from putting in a silly amount of photos..
This slideshow requires JavaScript.
So, to be fair those amazing Jack-O-Lantern Mushrooms were growing down the street from me and not in my lawn however they are so impressive I knew you would want to see them. I am confident that these are correctly identified because I asked my uncle John Trestrail and he is a poison specialist, he said don’t eat them. I guess eager mushroom hunters can mistake them for Chanterelle’s. There was at least one other mushroom out there that day but I could not figure out what it was, and I am certain that I may have mislabeled some here, so if you know better leave me a comment.
Back to the little stinkers…
So it felt wrong to introduce my menagerie of pets (and their poop) without including photos of them so here we go…
This slideshow requires JavaScript.
Yes, all of the sweaters are knit by me, one of the perks of owning small dogs in Michigan. Cats are not any fun to knit for however, they do like a plush knitted square to sit on year round.
Next time you get a good rain, stop to study what is growing, it may be far more then you ever imagined.
So this summer heralded a lot of lifestyle changes for my family and, having more time than money I thought I would try to grow some vegetables. I was inspired by what I found in my shed: decades old EarthBox’s. An EarthBox is a planter that is designed to be filled with potting soil, fertilizer + lime, covered in plastic and watered through a tube. In addition to the three planters I already owned, I inherited three from my mother-in-law so I knew I could grow a lot of plants and have a generous bounty.
EarthBox’s being prepared for planting. I used trash bags and duct tape instead of ordering their specialized cover.EarthBox’s on day one and day 31.
As you can see I was pretty determined to avoid weeding, and mowing around planters (been there, done that, no thanks.) I put down weed barrier fabric and bark mulch; to keep everything in place I used a handy edging system. This year we also added two small dogs to our family and keeping them away from my veg was important (read: don’t pee on the veg.) By creating a permanent home for the container garden I hoped I could allow the planters to overwinter in place and get refreshed with new fertilizer and topped off with potting soil, covered and replanted in the spring. I put the planter’s on 2×4’s, in case they needed to be moved and to avoid the drain holes getting clogged by bark mulch.
If you are a skilled gardener you may notice my naive belief that the tripod I constructed would be adequate support for SIX cucumber vines. I have never met a cucumber vine, I just know we like cucumbers and I quickly had to build another 8 foot tall tripod as well as a trellis on the deck railing to support the vines. In the end I think the vines grew about 20 feet long and climbed over 10 feet high.
Six Burpless Cucumber Vines finding their way up a tripod and trellis.
I also learned something about the difference between determinate and indeterminate tomato plants. Because the entire project was born out of a desire to have vegetables and do very little work I did not take seriously the invitation to “pinch” tomato plants. This failure triggered the construction of more 8 foot tall tripods to respond to a 12 foot tall tomato plant. No, not even at this point did I think about pruning, I think I was so delighted to watch everything grow. Eventually my daughter and I cut off the tops of the tomato plants because we couldn’t build anything tall enough to support the heavy fruits.
June 27th- My in-determinant tomato plant has a mind of its own, cute at first but then just crazy.
Taking Stock: What I Would Do Differently.
I put one bush style Roma tomato and one slicing tomato in an Earthbox. I think I would avoid this configuration in the future. The slicing tomato got huge and took all of the water and nutrients and the Romas did poorly. While I will want four tomato plants again I need to rethink who bunks with whom.
I planted one EarthBox with six bush style green beans. This was a lot of fun and I was able to pick green beans everyday and by the end of the week we had a healthy collection of beans to eat on Saturday. The plants continued to provide beans all summer and we would still be in October if a bunny had not taken out a lot of the plants.
I put six pepper plants in one EarthBox; this was pretty successful and I would have gotten more bell peppers if I had staked them better. One plant was badly broken under the weight of the fruit. I talked about my pepper projects in a previous blog post: Hot, Hot, Hot! In the future I won’t need to grow hot peppers and if you have any suggestions for what to plant leave me a comment.
In another EarthBox I planted six different herbs, and other then the quickly wilting cilantro this was a brilliant success. I also planted some Chocolate Mint and Dill in flower pots and was able to harvest and dry a lot of herbs.
The planter full of cucumbers was amazing and was so much fun that I would definitely repeat this set up next year, especially since I have the trellis and tripod already constructed.
This slideshow requires JavaScript.
The biggest disappointment and hiccup in the process was running out of nutrients and the development of blossom end rot. The indeterminate tomato took a lot of nutrients and water, as did the cucumbers and because I am a low work, high yield sort of a gardener I didn’t think to begin watering twice a day and providing supplemental fertilizer until the plants were already stressed. Next year I will be sure to add a richer fertilizer when prepping the boxes and begin using a water based fertilizer about 8 weeks in or at the first sign of stress. The EarthBox website makes the claim you can get your entire yield from the fertilizer put into the potting soil before planting. Maybe that can be accomplished with their proprietary blend but not with what I was using. Both the tomato and cucumbers got yellow leaves but eventually responded well to epsom salt and miracle grow added with weekly waterings.
For next year I still have some questions:
When do I stop providing plant food?
How do I know when a plant will stop giving fruit?
If one plant appears done for the season will it harm the others to cut it off at the soil level? Or should I just leave it until I pack up all the plants for the season?
Do I overwinter with the plastic covering on? or off?
How many years can I reuse the potting soil before I should just toss it all and start fresh again?
If my tomatoes did not get as large as stated on the label is it because of light or nutrients?….or both?
I think the project was a success and it gave my family of three enough produce to keep things interesting and to put some food aside for the winter months. If any of my readers have suggestions or feedback it is most welcome.
I became fully aware of my love for apples when I was pregnant. In 2003 I was living in Santa Fe, New Mexico, and while the area did grow some apples it was clear there was an apple “season.” When apples were out of season they became expensive and it was hard to find any varieties other than Golden and Red Delicious (my least favorite). I cried that day; that was the only thing to move me to tears during my pregnancy…I had to settle for pineapple.
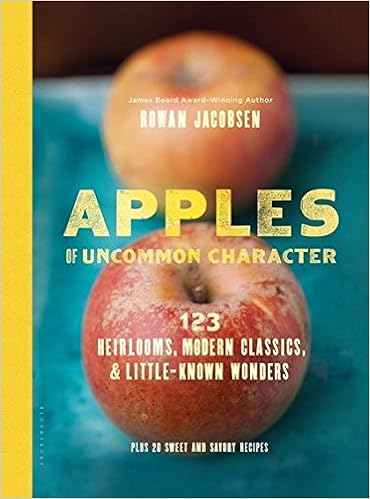
Michigan is another story, they grow SO MANY apples. And, right now is apple season! I’m such a nerd for apples, I have even named some of my Etsy offerings after apple varieties. Apples can be eaten fresh, cooked, pressed, fermented and when the cider is no longer sweet you get vinegar! Truly amazing! According to R. Jacobsen’s book Apples of Uncommon Character: 123 Heirlooms, Modern Classics, & Little-Known Wonders, in the 17 and 1800’s a typical homestead would have a dozen different apple varieties growing. In the 1900’s, as the self sufficient American farm declined America saw the rise of the industrial-scale orchard and the surviving varieties were the Red Delicious, Golden Delicious, Granny Smith, and MacIntosh; gone were the thousands of regional varieties.
Jacobsen says “apple trees are very patient. It’s nothing for them to wait a hundred years, even two hundred. There is a bent old Black Oxford tree in Hallowell, Maine, that is 215 years old and still gives a crop of midnight- purple apples each fall.” He says the last old varieties are dying out and he has set himself to trying to find the identity of these varieties before they are gone forever.
I think the desire to explore more apple varieties is catching because locally I can find up to 6 varieties at my grocery chain. Every fall we drive to the outskirts of Kalamazoo Michigan and visit Gull Meadow Farms – an orchard, pumpkin patch, bakery and family fun center (but I think these games and props are just a distraction from the enjoyment gained picking apples with your family, but I know kids under 13 would disagree.) I visit the orchard weekly during apple season; they even have a text message service that tells you when new varieties are being harvested. Our current favorite is Crimson Crisp and I brought home its cousin Candy Crisp for us all to try. I am not a fan of the largely popular (and expensive) Honey Crisp because it is TOO sweet. I prefer an apple that is nicely balanced between tart and sweet with some complex flavors.
Crimson Crisp and Candy Crisp Apples from Gull Meadow Farms in Richland, Michigan
If you can, go out and try some different apple varieties. Avoid apples flown in from New Zeland or other far flung areas (even though they are also amazing) and when in season buy local or regional offerings. I gave myself this pep talk at CostCo and pushed past their apples to make a commitment to drive to the local orchard.
Too many apples? No problem, just cut them into even shapes and add them to a pot with a 1/2 cup of water or apple cider (less if they are juicy, more if they are dry) and cook stirring often until you get applesauce. I remember arriving in Munster Germany as an exchange student in 1991 and Frau Witz offered me some apple sauce made from apples grown on the tree just outside her backdoor. It was so comforting, and was the very first thing I had to eat in Germany. I learned how to make it for myself and ate it many times that winter (with cinnamon, no sugar.) I never did learn the name of those apples.
This slideshow requires JavaScript.
I told my husband that I was going to write about my love for apples and he told me about Michigan’s Apple Crunch. On October 23rd, 400,000 or more people will eat apples to celebrate this amazing fruit. Here is what I learned from their website:
Apples are a member of the rose family
It takes the energy from 50 leaves to produce one apple
The largest apple ever plucked from a tree weighed three pounds, two ounces, and was picked in Caro, Michigan.
There are 900 family-operated apple farms throughout Michigan’s Lower Peninsula
Michigan is the 3rd largest apple producing state in the country
Apples are Michigan’s largest and most valuable fruit crop, with a value of about $100 million annually
On average, Michigan harvests about 20 million bushels (840 million pounds) of apples per year
Apples are a great source of the fiber pectin. One apple has five grams of fiber
The science of apple growing is called pomology
Maybe you can get your hands on some Michigan apples and will join me! Register to take part at Michigan’s Apple Crunch.
Today, I have two pecks of apples in the kitchen and I am not going to think about the end of the season.
So here in Michigan a fall chill or even full-on winter weather has been known to come too early. Notably, we often have to send our kids out to trick or treat in their coats and one year it snowed on Halloween! I am not sure when it started, but somewhere along the way I made it a point of personal pride to avoid turning on the furnace until the last possible moment. September is totally unacceptable and if you’re such a cupcake that you turn on the heat this early, then yes, the rugged people of Michigan are judging you. Now that it is October we are getting into some marginal territory; where it is acceptable in *certain circumstances* however, not fretting about your gas bill when you open the door 50 times for trick or treaters is the real treat.
Here is a Weather Channel chart for when the first snow can be expected. If your area is not listed, follow the link below for other regions in North America. In 2006 we had record snowfall on October 12… these are the certain circumstances mentioned above.
Portage Michigan is about half-way between Chicago and Detroit so there are two techniques I use to maintain my ability to proudly say “I have not turned on my furnace yet” even when the temps get chilly:
Use the oven
knitting
Making a pumpkin pie or roasting some vegetables is a great way to get your kids to stop complaining about the cold. Here is what I prepared today …
Roasted brussels sprouts, potatoes and cauliflower rice drizzled with Siracha.
This was a good way to keep the oven on for at least 45 min shoveling trays in and out at 425 degrees. Just in case I am the only one who eats the brussels sprouts I baked an Apple Dapple Cake (sans frosting) to make sure everyone has a full tummy.
I could not bring myself to add the frosting after dumping two cups of sugar into the batter. The cake kept the oven on for one hour and we are all pretty happy about that with overnight temps in the 40’s.
The other approach is knitting. This is the time of year we start wearing hats in the house; including snuggly sweatshirts, socks and scarves. I have just finished knitting for my new grand niece and can begin everyone’s hat for this year any time. Here is a collection of hats made last year; most of them gifted.
This mini Mackintosh Jacket will need to wait for the little one to grow into it. However, having the yarn piled into your lap is a nice way to stay warm. Here’s to making it to Halloween before turning on the furnace, wish me luck!
I love growing hot peppers and the jewels in the crown of my garden this year are the Tabasco Pepper and The Gong Bao Pepper. The plants were beautiful however I suspect their location did not deliver enough sunshine as the Anaheim’s were short and less abundant. I grew four kinds of peppers that are prepared in very different ways.
Serrano- eaten fresh red or green in salsa
Anaheim- roasted and diced, added to anything you want to have a little kick
Gong Bao- dried and crushed to eat on pizza, pasta and soups
Tabasco- mashed and fermented into a hot sauce
I will share more about the hot pepper sauce we are planning to make with the Tabasco Pepper but today I thought I would share how I am preserving my Gong Bao Pepper.
This slideshow requires JavaScript.
While the Serrano and Anaheim peppers are meant to be eaten green the Gong Bao are intended to be a brilliant red pepper with thin walls, good flavor and moderately intense heat. This plant was so beautiful and delivered red peppers in July and continues to produce into October. So that I don’t get overwhelmed I created some ristras.
Creating a ristra with needle, sturdy thread and gloves to protect my fingers from the hot juice.
This is a simple process of stringing the chilis together and hanging them in a dry airy place. In past years I have strung chilis by piercing them at their stem however when they dry the stems want to fall off and this can make the ristra more fragile. Here I simply pierced them in the middle of each pod and keep the needle attached so that I can add more as they ripen and are harvested. When full I tie it to some cardboard and start another. Don’t forget to wear gloves for this project the fresh chilis will emit juice when pierced with a needle.
Gong Pao Thai Chili ristras hanging in my family room alongside some rosemary and sage.
Eventually these will be dry enough to process into red chili flakes. The green stems are removed and the pods placed into a blender. Depending on the level of heat you enjoy you can remove some of the seeds for a milder effect. My husband likes to grind them with a spice/coffee mill and put it in a shaker so hot pepper can be added to everything.
Halloween Wreath made from grapevine, toy snakes and spray paint.
Halloween wreath.
So Pinterest is a wealth of inspiration and with a trip to your Dollar Store and some spray paint you can make this basic snake wreath in a couple hours. For a couple more dollars you can give it some flair with a skeleton and roses. Keep reading to learn how.
Getting Started
If you have access to some vines (grapevines or Virginia creeper for example) you have a free resource. See my blog post on working with grapevines to get this basic wreath shape https://piratepieman.home.blog/2018/09/25/grapevine-time. Or, you can purchase a grapevine wreath from your local craft store. Joanne’s Fabrics and Michaels are always running a promotion or offer a coupon so depending on the size you want this could cost about $5-$10.
Grapevine Wreath
Supplies You Need
vine wreath
cool temp mini glue gun
wire
wire cutters
pliers
spray paint- metallic bronze
dollar store: skull, snakes, bugs, flowers, skeleton hand tongs, ribbon, mini hat
Supplies needed
Dollar Store embelishments
Assembly
I used a combination of wire and hot glue to affix the snakes and bugs to the wreath. I also wove the snakes in among the vines; do what works to keep them secure.
Add dollar store snakes
When everything is attached begin spray painting. It is easy to miss spots because of all of the twisty vines and snakes so take time to walk around the project and turn it around so that you get an even application. This process may take a couple coats. I did mine outside so clean up was simple and the area was well ventilated.
Halloween Wreath made from grapevine, toy snakes and spray paint.
This is where going back to Pinterest is a lot of fun. People are super creative and I was inspired by wreaths using skeletons. I found a simple skeleton head, some arms and black roses with eyeballs at the Dollar Store. As you can see I thought I would use the black spooky fabric in my design but instead used some gold mesh ribbon; do what appeals to you. I poked holes in the back of the skull and threaded wire through to secure it to the wreath.
I got my Halloween Box up from the basement and repurposed a costume headband. I found the key to this project was the even application of the snakes all around the wreath and then using a pop of color to add some luxury and visual interest.
Halloween wreath.
In past years I have hung the basic snake wreath with just a bow and I liked how the snakes are camouflaged and hidden in the simple design. However this year I decided to change things and added embellishments. About every other year I find I get a little tired of my designs and I take items off or just add new elements so that I am excited to see it on display.
In 2011 my husband James innocently brought home a Niagara Grape Vine and asked me “where should we plant it?” I thought our stark chainlink fence separating the front and back yards would be a nice structure to support the vine and, into the ground it went. On September 8th, 2013 we got our first (and best) harvest of grapes.
Niagara Grapes, West Michigan 2013
Niagara Grape Harvest
Niagara Grape Jelly 2013
Single Niagara Grape vine growing on fence in 2018.
It was a big project but I made some mediocre grape jelly which was tasty but runny. Most years we allow the birds (often Cardinals) to have the grapes (and raisins); the primary harvest for myself has been the VINE! Since I started using grapevines for projects in 2014 I have learned a few things about crafting with vines, here is what you need to know:
Supplies:
Gloves
Pruning shears
Measuring tape (so you know how big your wreath will be)
There is a sweet spot for working with grapevines. Too soon and you might as well be working with asparagus, too late and you are working with toothpicks. I have made both of these errors. This photo shows the magic balance between green vines and drier areas that are darker in appearance. If the canes are too dry they can be soaked in water to make them less brittle and if they are too green you can let them dry out a day, maybe two. Even if the canes break or splinter you can continue to make loops and wrap them up. When the globes or wreaths are dry you can adjust the vines to improve the overall appearance.
Grapevine Wreath
I usually start from the ends of the individual vines and remove leaves with my hands and then with sheers trim the tendrils away from the fencing and other vines to produce a pile of canes. I sort the largest canes for bigger wreaths and begin arranging them in circles using the longest most flexible vines to wrap around the bulk to secure the wreath.
Vines stripped of their leaves.
Wreaths set out to dry.
This year (2018) I got started a little too early and the vines were easily broken (like asparagus) but I had a lot of them so I pushed ahead anyway. As you can see one grapevine in a sunny location in West Michigan can give you a lot of material to work with.
Because in past years I have made a lot of wreathes, I was interested in trying some 3-D globes I saw on Pinterest. Off to the Dollar Tree I went for some beach balls. They worked well to hold up the vines while I wrapped them. In addition to these globes I made a smaller one freestyle without an armature; and some larger wreath shapes (since I already have some small and medium wreaths from last year.) It takes a couple days in the sun for the vines to dry and turn reddish brown. I fed my failed attempt to fashion a basket to Donald https://piratepieman.home.blog/2018/09/11/feeding-donald-our-hot-compost. It was so bad it couldn’t even be photographed well.
Grapevine wrapped beachball to create a globe.
Overlapping first few vines to secure the base shape.
I tried to keep the vine’s tendrils for visual interest.2018 grape vine projects.
And once your shapes have dried you are ready to start doing some crafting. I have not fully sorted out what I am going to do with my new globes so if you have any suggestions please leave them in the comments below.
Examples of how to decorate your grapevine wreaths.
Autumn wreath embellished with pinecones and artificial flowers.
I gave a wreath to my friend DeLight and she created this glorious monogrammed beauty.
Winter wreathHalloween wreath.
Look for my tutorial on making the Halloween Wreath here:
So as part of my daughter’s interest in vegetarianism we have been trying different protein options like tofu, seitan and tempeh. Seitan is made from vital wheat gluten (so if you do not tolerate gluten then skip this recipe) and has been a part of Buddhist vegetarian culture since the 6th century. Today a 4oz package of seitan can run almost five dollars! For that price I was pretty motivated to see if I could make it myself. The internet was happy to accommodate, and lead me to Sam Turnbull’s website: https://itdoesnttastelikechicken.com/vegan-seitan-steak/ who provided lovely photos and encouragement.
Encouragement which was needed because not only do you need to mix and knead the ingredients but you also need to steam the steaks and then grill them- Whew! This puts the project solidly in what I call the “casserole zone” which is a zone of contempt; because I have no patience for double cooking (e.g. cooking noodles, mixing and baking) takes hours- ugh. At the moment I have more time than money so here we go!
Seitan being made at my home.
The Adventure
Ingredients for the vegan seitan steaks were simple and included lentils, vital wheat gluten and some seasonings; including nutritional yeast and smoke flavoring which I had on hand but many people may not. I was instructed to mix well, which I did in the food processor, knead the dough on the counter, and shape with a rolling pin. So, I forgot the pepper (oops) and swapped ketchup for tomato paste because I was out. It was very much like making bread. My steamer is an insert designed to work with a sauce pan and encouraged the steaks to curl but they did puff up like suggested. I used maple syrup for the marinate and added the pepper forgotten previously. Here are some photos of the steaks before and after being steamed.
Being formed.
Steamed seitan steaks
The whole process takes quite a while; 15 min. to make the dough, 5 to knead it, 25 to steam them and another 30 to marinate the steaks…where are we? Oh, two hours later you can deliver them grilled to the table.
Grilled Seitan steaks.Seitan steak sliced with broccoli and egg noodles.
The Results
Overall we were pretty happy with the results. It was tasty, and had a better basic flavor then the prepared seitan from the store. I’ve had better results getting a crunchy caramelized finish with frying smaller un-marinated pieces and glazing them with sauce at the end (instead of marinating.) For example, sauces having a higher sugar content like Soy Veh Marinade & Sauce- Veri Veri Teriyaki or Stubbs BBQ Sauce. In this instance the sugar in the marinate burned pretty quickly and prevented the seitan from getting crispy around the edges. Many recipes will have you boil the dough for up to an hour in broth; which is an approach I have not tried but I imagine would change the texture and make it softer, less meaty.
As a basic starting point this recipe was very good. The spice profile of a basic seitan dough could be changed to suit your recipe (Mexican, Italian etc) and it can be frozen for use later; which makes the long prep worthwhile when it means quick prep for less coin on a busy week night. I will put the leftovers in some burritos with grilled bell peppers and onions. I think I will defiantly make this again to use in soups and stir fries. I also like getting the long strips this approach facilitates because the prepared packages often come in irregular shapes.
If you are interested in seeing how seitan is made from basic all purpose flour (instead of packaged vital wheat gluten) I found this video from 2009 https://youtu.be/s9vHa66Bm5E. It is worth checking out just to read the funny comments- comments earned honestly! But I doubt I will ever go to the trouble of making seitan from scratch. If I do, I think I will have to create a “seitan-zone” to use when I refer to something with contempt for being overly complicated and arduous.
Yes, even though I am in my late 40’s I LOVE YouTube. It has everything. It has taught me the Kitchener Stitch (a knitting technique), dog grooming, cosmetology and after watching hours of VetRanch I could probably neuter a dog (not really.)
So, YouTube talked me into replacing my 60 year old basement windows…myself (with my husband James.) In the 1980’s our mid-century ranch underwent a major expansion that added a lot of living space and created a finished living area in the basement that included replacing half of the basement windows with glass block. When we purchased the house in 2006 I always imagined I would have the rest of the windows treated similarly. Today, having more time than money I started to do a little research. I watched a collection of videos that approached the project in pretty much the same way and convinced me simple vinyl replacement windows were easier, and cheaper than glass block. Here is one that captures the essence of the work (watch out he will make you want a drywall hammer.)
Here is what I learned: I needed a window, expanding foam (low) and caulk. I had to buy a small level, because I could not find mine, otherwise I was good to go for very little coin. We did not use a chisel but instead used a very large heavy file to smooth the cement ridge we encountered.
The Old Windows
At some point previous owners covered the windows with window clings to resemble stained glass; maybe to distract from the cracks or because they had things in their basement more valuable then cat turds.
Old windows held together with window clings. Notice significant *spooky* spider activity.
The detail that I glossed over was his use of a Sawzall and if you have very keen observation skills you will notice that my window frames are steel and married to the house with cement (not the easy going modern wood frame structures other more fortunate people might encounter.) The first window went pretty smoothly so we ran to the store and bought two more. Installing three windows took the entire day. The most harrowing moments were encountered trying to demolish the old window frames. The steel casings didn’t want to budge and we used a hack saw in order to weaken them enough to pull them out. Twice we thought “Oh shit we have destroyed this window (and have made a big hole in our house) and we will need a professional (we can’t afford) to finish the project.”
Demolition and the “will it fit?” moment…
The New Windows
His advice for measuring both inside and outside was important. While each window looked similar each had different measurements by 1/4 inch but we settled on one window size for all. We removed the screen and glass so that we could install the frame and then just re install the window after we were done, this step (not mentioned in this video) was helpful and I recommend doing it. The window was a good pick and the plastic trim along the edges of the frame was easy to cut off to adjust the fit. The slide-show below highlights the window we purchased, the foaming in and the trimming of foam.
This slideshow requires JavaScript.
Expanding foam really expands and as you can see I went way overboard. I read elsewhere that trimming it like we did lowers the ‘R value’ (according to https://www.energy.gov/energysaver/weatherize/insulation thermal resistance or R-value — the higher the R-value, the greater the insulating effectiveness) and it is better just to push the bubbles back into the frame so I did that were I could. My foam application technique improved with each window but it was pretty fun to work with and hard to refrain from using the ‘more is more’ philosophy. Trust me with expanding foam ‘less is more.’
Finishing With Caulk
My husband and I, and the friendly guy at Lowes, went around and around about whether to use cement caulk or regular caulk and then we went with Silicone. Working with 100% Silicone Calk was not fun. I have done my fair share of work with painters caulk and don’t be fooled they are NOT THE SAME. The reason for using 100% silicone was how well it adheres to a variety of materials. In this case we had wood, vinyl and cement and we needed it to perform well indoors and out. 100% silicone is much softer initially and does not lay down a tidy bead like was highlighted by my Canadian muse Jeff Thorman (what a great name, no wonder he sold me on the drywall hammer.) It wanted to drip and puddle so I learned to apply a little and allow it to set up and then smooth it into place with a plastic putty knife. Not pictured was the masking tape used to keep foam or caulk from sticking to the pretty new window but Mr Thorman recommended it and he was right. I was unsure about selecting grey caulk instead if white but hoped it would soften the transition to the cement (which I think it does) however it is still shiny even when dry which I didn’t anticipate. I used the same product inside even though this type of caulk can not be painted; because the walls surrounding the window are unfinished (unlike in the YouTube video) and if they are eventually finished it will be covered up by drywall and not painted.
Finished install with silicone caulk.
The Highlights
Over all, the project took about 8 hours the first day (to demolish old windows and install new) and two hours the second (to trim/poke the foam and apply caulk.) I spent a lot of time outside on my stomach or knees while James was inside on the ladder in the basement with his head in a spider webs (it sounds dirty and it was.) Here is a list of everything we used:
Ladder
Hammer
Pry-bar
Heavy metal file
Hacksaw
Gloves
Goggles
Blanket (so I was not sitting in the mud)
Pencil
Measuring tape
Level
Masking tape
Windows
Caulk
Expanding Foam *for Windows and Doors*
Putty knife
Utility knife
Paper towels
Task brush/broom
Teenager to make Mac N Cheese while you shower because you can’t use your arms anymore.
The pain of refinishing twin 80 year old Simmons pressed metal dressers. I mentioned in a previous post that this summer my mother in law moved into assisted living and the home she built and lived in for 60 years was sold. There was a lot of sorting and deciding what artifacts we wanted to become a part of our hoard and what was going to have to find its own new path. My husband and I have never invested much in furniture and my now 14 year old daughter was still using the dresser we got at Target to house her baby clothes; so we brought home two Simmons pressed metal dressers. These dressers had been living in her basement holding her linens and gift wrap for fifty years.
1930’s catalog insert for Simmons furniture collection.
The dressers had been painted multiple times so I naively set out to strip them and paint at least one for my daughter. During my research I stumbled across what hipsters are doing with these dressers and found this:
Similar pressed metal dresser advertised on Urbanremainschicago.com
So with too much time on my hands I got started.
IT WAS HELL. It took MONTHS to strip all the paint meanwhile I was parking in the driveway (while the dressers lived it up in the garage), I sustained chemical burns (yes I did try CitriStrip and it was too cute to get the job done) and ruined quiet a few outfits and one pair of shoes. I started in March before it got too hot but that discouraged the CitriStrip from working; and when it got hot my rubber chemical resistant gloves filled with sweat that would pour out every time I lifted my hands. Hell I say!
This slideshow requires JavaScript.
As you can see both dressers were stripped, one is finished and has become part of the family however the other one continues to sit in the garage rusting. Here is why: I read Michelle Hinckley’s blog (of course only after I was deep into the project) and I was not sure if it was providing me an inspiration or warning?
Her blog post was hilarious, and I felt so much better after seeing what she went through but I had no idea how to achieve that finish! It was heavenly and magical and I want it. My husband did a test area with steel wool and it became a mirror finish. OH-HELL-NO. So what do I do?
Perhaps I should take my childbirth analogy to heart; polish the dresser, accept it’s flaws, and seal it with furniture wax and bring it into the guest bedroom for the winter. When the pain of labor from this past summer fades I can continue to try to get that smooth even finish Michelle Hinckley wisely paid someone else to deliver.


 I gave a wreath to my friend DeLight and she created this glorious monogrammed beauty.


